BlueStacks does not have a built-in option to configure proxy settings. However, there are a couple of workarounds that you can use to proxy your BlueStacks traffic.
There is a third-party application that can be used to route traffic from specific applications through a proxy server.
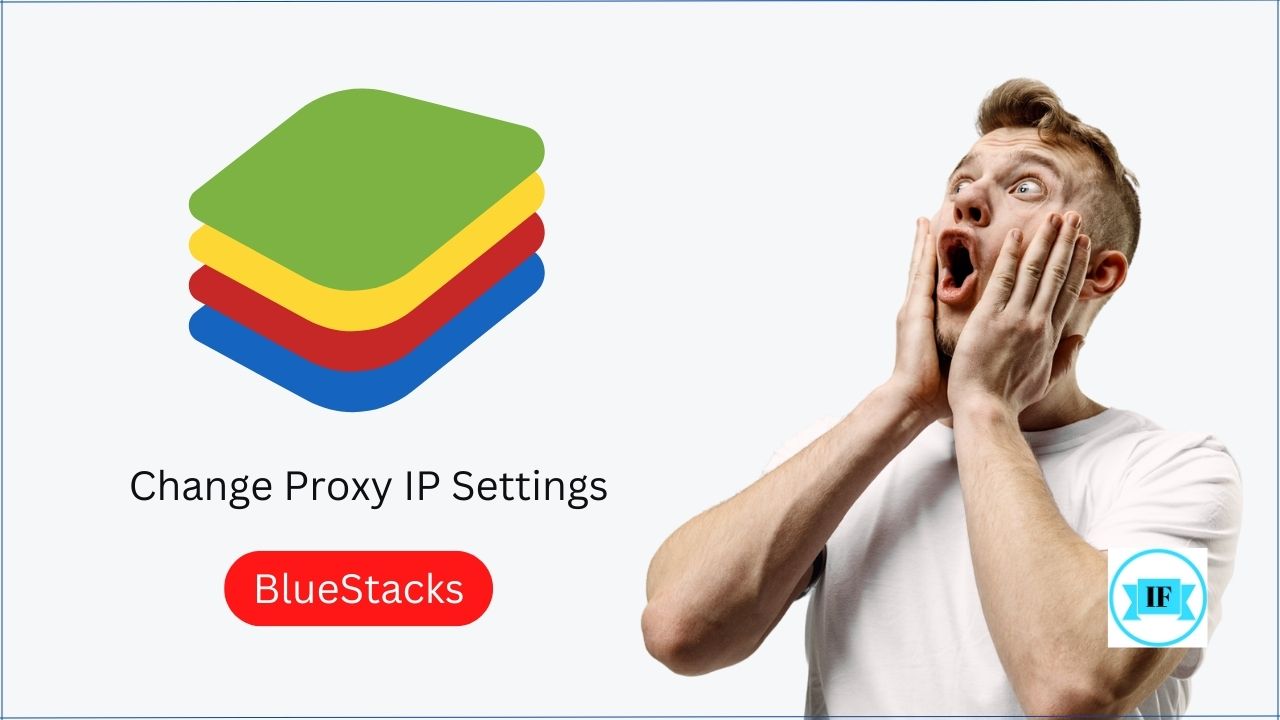
Here, we’ll guide you through the process of changing proxy IP settings in BlueStacks step-by-step. So let’s dive right in!
Why to Configure Proxy Settings in BlueStacks
Configuring proxy settings in BlueStacks allows you to route your internet traffic through a proxy server, which can provide several benefits, such as enhanced security, bypassing geo-restrictions, and improved performance.
There are two main methods to configure proxy settings in BlueStacks:
Method 1: Through Windows Command Prompt
- Open BlueStacks app
- Open Windows Command Prompt. To do this just press Windows+R
- Type cmd and hit the Enter button or click on the ok button
- Change it to the BlueStacks Program folder: cd C:\Program Files\BlueStacks. This command changes the Command Prompt’s working directory to the BlueStacks installation folder.
- Run this command: HD-ConfigHttpProxy.exe
- To set a new Proxy, use this command: HD-ConfigHttpProxy.exe set <host> <Port>. Don’t forget to replace
<host>with the IP address of your proxy server and<Port>with the corresponding port number. For example, if your proxy server’s IP address is 123.67.87.999 and the port number is 2222, use the following command: HD-ConfigHttpProxy.exe set 123.67.87.999 2222 - If everything is right you will get a successful message on the screen
- Now close and re-start the BlueStacks
How to Test if the Proxy Settings Are Working?
After configuring the proxy settings in BlueStacks, it is important to check if they are working properly. There are a few ways to test if the proxy settings are working correctly.
The simplest way to test if the proxy is configured correctly is by opening a web browser within BlueStacks and trying to access a blocked website. If you can access the website without any issues, then your proxy settings are working fine.
Another way of confirming that your BlueStacks’ IP address has changed is by using an online IP checker tool. These tools will show you which IP address you’re currently using and whether it matches the one assigned by your selected proxy server.
There’s also another simple method for testing proxies called “Ping Test”. To perform this test, open up Command Prompt on Windows or Terminal on macOS and type in ‘ping google.com’. If successful, this command should return information about packets sent and received from Google’s servers through your new Proxy connection.
Keep in mind that some websites may block certain IPs or VPN providers altogether, so make sure you try multiple websites before concluding that everything works as intended.
Method 2: Setting up proxy in BlueStacks via Proxifier
Proxifier is software that allows network applications that do not support working through proxy servers to operate through an HTTPS or SOCKS proxy server. Follow these easy steps to set up the proxy server via Proxifier.
Step 1: Download and Install Proxifier
- Download the Proxifier software from the official website: https://www.proxifier.com/
- Run the downloaded installer and follow the on-screen instructions to complete the installation process.
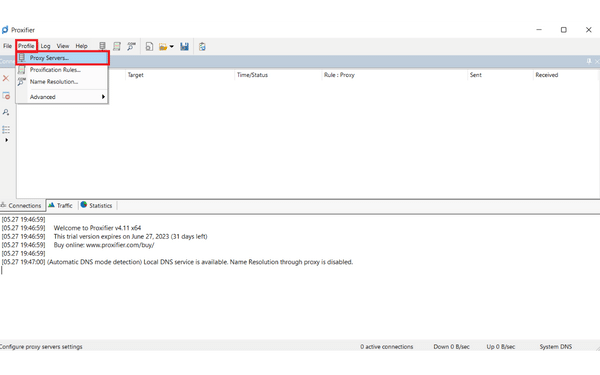
Step 2: Add Proxy Server
- Open Proxifier and click on the “Profile” menu.
- Select “Proxy Servers” from the drop-down menu.
- Click on the “Add” button.
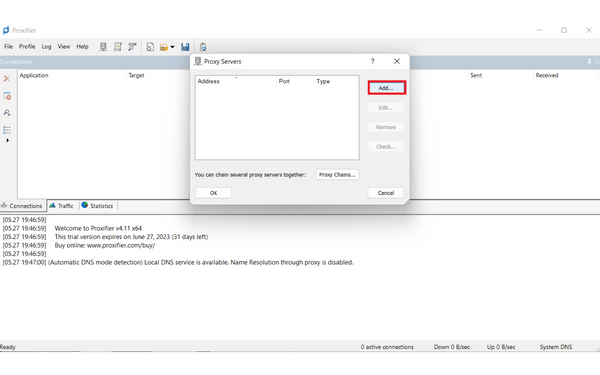
- Enter the details of your preferred proxy server, including:
- Hostname or IP address
- Protocol type (e.g., HTTP, HTTPS, SOCKS)
- Port number
- Username and password (if applicable)
- Click on the “OK” button to save the proxy server settings.
Step 3: Add BlueStacks as a Target Application
- Click on the “Profile” menu again.
- Select “Select Target Applications” from the drop-down menu.
- Click on the “Add” button.
- Select BlueStacks from the list of applications.
- Click on the “OK” button to save the target application settings.
Step 4: Restart BlueStacks and Proxifier
- Close BlueStacks if it is currently running.
- Close Proxifier.
- Open BlueStacks.
- Open Proxifier.
BlueStacks should now be using the proxy server that you configured in Proxifier.
What to do if you can’t access the internet on BlueStacks for macOS due to a different DNS?
If you’re having trouble accessing the internet on BlueStacks for macOS due to a different DNS, don’t fret. There are several steps that you can take to fix this issue.
Double-check your network settings to ensure that they are configured correctly. You may need to adjust your network adapter settings or change the DNS server addresses manually.
If this doesn’t work, try flushing your DNS cache using the terminal command “sudo killall -HUP mDNSResponder”. This should reset your DNS configuration and allow you to connect to the internet on BlueStacks.
Another solution is to use a VPN service that has its own DNS servers. This will bypass any issues with your local DNS server and allow you to access the internet on BlueStacks without any problems.
If none of these solutions work, consider contacting BlueStacks support for further assistance. They may have additional troubleshooting steps or be able to identify an underlying issue with your system configuration.
There are several options available if you can’t access the internet on BlueStacks for macOS due to a different DNS. Take some time to troubleshoot and find a solution that works best for you. You may try the below one:
- Launch BlueStacks
- Open the Launchpad from the dock
- Type “Terminal” in the search box and then open the application
- Enter this command in the terminal: /Applications/BlueStacks.app/Contents/MacOS/confighttpproxy
- Confirm that you have correctly entered the command. You will likely see this text message on your screen if everything is right: confighttpproxy set <host> <port> confighttpproxy reset
- To set the new proxy, Enter this command: /Applications/BlueStacks.app/Contents/MacOS/confighttpproxy set <host> <port>
- In the above command Replace <host> <port> with your desired IP Address that you want to change in BlueStacks
- If everything is right a successful message will be displayed on the screen: HTTP proxy server was successfully added. Please restart BlueStacks.
- Now, restart the BlueStacks to enjoy it with the new IP Address.
What is BlueStacks?
BlueStacks is a popular Android emulator that allows you to run Android apps on your computer. This software was developed by an American technology company called BlueStacks Systems Inc., which was founded in 2009.
There are dozens of apps similar to Bluestacks available on the internet but the BlueStack is considered one of the best them.
The primary objective of BlueStacks is to offer seamless integration between mobile and desktop platforms, making it easier for users to access their favorite games and apps on their computers like Roblox, Fortnite, etc. With it, you can play games, use social media applications, access messaging services such as WhatsApp, Instagram, TikTok, or Viber, and even stream live TV channels.
BlueStacks supports both Windows and macOS operating systems and has over 210 million active users worldwide. The software uses virtualization technology that enables the emulation of the ARM architecture used by most modern smartphones.
It offers an efficient way of running Android applications on your computer without having to purchase a separate device altogether.
What is a Proxy Server?
A proxy server acts as a mediator between the internet and your device. When you request to access any website, it first goes through the proxy server before reaching its destination. The main purpose of using a proxy server is to maintain anonymity while browsing online.
Proxy servers can also be used for many other reasons such as bypassing restrictions put in place by network administrators or internet service providers. By routing your traffic through a different location, you can avoid geographical restrictions on certain websites or content that are not available in your region.
Conclusion
Changing proxy IP settings in BlueStacks can be a little tricky at first, but once you get the hang of it, it’s quite simple. By following the steps outlined above, you should be able to successfully configure your proxy settings in BlueStacks and start enjoying all your favorite apps with increased anonymity.
Remember that using a proxy server is just one way to protect your online privacy and security. There are many other tools and strategies you can use to stay safe on the web, so don’t hesitate to do some additional research if you’re interested.
We hope this article has been helpful for anyone looking to change their proxy IP settings in BlueStacks. If you have any further questions or comments about this topic, please feel free to reach out to us!